Anyone any good with woodwork?
Moderators: pompeiisneaks, Colossal
-
jammybstard
- Posts: 40
- Joined: Fri Mar 05, 2010 7:50 pm
Re: Anyone any good with woodwork?
UK, I should add!
Re: Anyone any good with woodwork?
Getting in on this discussion too late to be much help..But.. Go to
www.silvatone.bravepages.com/ take a look at his 18 watt build..Will walk you through most of the process. Also a set of drawings for the cab.
www.silvatone.bravepages.com/ take a look at his 18 watt build..Will walk you through most of the process. Also a set of drawings for the cab.
-
jammybstard
- Posts: 40
- Joined: Fri Mar 05, 2010 7:50 pm
Re: Anyone any good with woodwork?
Very cool; and very similar (if a bit more Pro) than how I've done it.labb wrote:Getting in on this discussion too late to be much help..But.. Go to
www.silvatone.bravepages.com/ take a look at his 18 watt build..Will walk you through most of the process. Also a set of drawings for the cab.
I'd like any advice on getting hold of cut sheet metal in the UK!
-
CapnCrunch
- Posts: 220
- Joined: Sun Dec 21, 2008 3:26 am
- Location: Seattle
Re: Anyone any good with woodwork?
Make your cutout a little deeper so that everything you already have will fit.
-
guitardude57

- Posts: 355
- Joined: Fri May 15, 2009 6:19 pm
- Location: Austin, TX
- Contact:
Re: Anyone any good with woodwork?
It is usually a good idea after assembling the cabinet, to check fit the chassis.........before putting the finish on the wood.  All screws should be drilled for, to position the chassis in the right place. When all is good, then put finish on the box. Looks like the depth of the box is a smidgen too short.
Hopefully you have room to cut out control cavity more, and move things forward. Then round over the edge to allow more space for knobs. Then touch up your finish where it was cut. Hopefully new finish will match with old finish.....or strip and redo if not.............
Maybe a 1/4 to 1/2" round-over bit on all the corner edges, depending on what look you are going for. Makes for a smoother Tolex job as well.
This also helps prevent the wood from splitting if any edge gets bonked against a hard surface, like a car trunk lip, bumper etc.
The box looks well made
Mike
I am never surprised and always amazed
I am never surprised and always amazed

Re: Anyone any good with woodwork?
Just adding 2 cents: if you go with T-nuts use the Hurricane Nuts from Parts Exp - they are brilliant. The screw holes will be real close to the cut-out edge and regular t nuts can split or weaken the edge. Always use a bolt and fender washer to draw in your T-nuts never a hammer - and don't go crazy with force as you can warp the barrel. The Hurricane ones are a little darker steel too they show a little less through the grill cloth with a black baffle at least. Maybe a touch bigger in diameter so they stick out more over the edge. Hiding the T nuts or screws wouldn't be worth the effort IMO, wood putty would eventually crumble out, a plug would require a very thick baffle, or you'd have to double the baffle or laminate it. More stuff to rattle. If using T nuts with anything over the front you'd have to be super precise with your bolt length so they'd snug up tight to the speaker but not hit whatever was in front and, so would anyone in the future who's not you and replacing a stripped bolt and not paying attention. So the speaker screws would be best for hiding this way but, they will loosen eventually and you'd have no way to re-tighten. If your baffle is 3/4 you could use a forstner bit to countersink the t-nut a ~1/16, they'd show but would look very serious and professional. BTW the general rule with rounder over is half the thickness ie 3/4 wood, 3/8 RO bit, so you still have something for the bearing to ride on. The metal corners do seem best with 1/2 RO however, but I always use 3/8 anyway and they look fine. Fenders look 3/8 to me. Good weekend.
-
guitardude57
- Posts: 355
- Joined: Fri May 15, 2009 6:19 pm
- Location: Austin, TX
- Contact:
Re: Anyone any good with woodwork?
I agree.........taking in account of material thickness, the round over bit bearing needs to sit on the material............. there are different length shanks on these bits.......just use the right one............
Mike
I am never surprised and always amazed
I am never surprised and always amazed
Re: Anyone any good with woodwork?
My approach to using T-nuts is to slightly countersink them, as suggested, but I put a dab of 5 minute epoxy under them to hold them for ever to the wood. Then if you want a really smooth outside, use a bit of bondo after the epoxy is set.
Rich Gordon
www.myspace.com/bigboyamplifiers
"The takers get the honey, the givers get the blues." --Robin Trower
www.myspace.com/bigboyamplifiers
"The takers get the honey, the givers get the blues." --Robin Trower
Re: Anyone any good with woodwork?
If you want to hide the tnuts, can't you sink them with a Forstner bit and then fill, sand, and veneer over them?
-
guitardude57
- Posts: 355
- Joined: Fri May 15, 2009 6:19 pm
- Location: Austin, TX
- Contact:
Re: Anyone any good with woodwork?
Depending where they are (t-nuts) mounted, the material thickness and the length of the screw, sure they can be hidden. Countersunk and pegged, laminated over....etc. I would not do it, for if they strip out you can't replace them very easy. These can strip like any other screw/nut.
For speaker baffles just get black ones, install with a little wood glue under the flange around the spikes before you tap them in, and forget about it. Damp cloth to clean any excess glue. Grill cloth will hide the sight of them enough. No worries.
No need for too major of an operation just to mount speakers.
Last edited by guitardude57 on Sun May 30, 2010 3:09 pm, edited 1 time in total.
Mike
I am never surprised and always amazed
I am never surprised and always amazed

Re: Anyone any good with woodwork?
I don't think it is wise to have an exposed bottom of the chassis made from conductive material. While, technically, wood is a conductor, it is not highly conductive (low moisture content).
If this were mine, I would recut the top of the cabinet. Yes, I know what you are up against and there is clear risk that it won't work out. Here are some suggestions.
First, using a bit of the correct radius, I'd drill out the "corners". You may need to figure a way to screw a block of wood in place so you've got enough of a drilling target. If this isn't feasible, then you are pretty much on your own with hand cutting it with a coping saw and working it with files and sandpaper until it looks OK.
Second, (yikes, is he really going to tell me this?) use a circular saw to cut the strip of wood between the two holes you just drilled. The technique requires a good saw (no wobble) and very sharp blade, preferably a fine cut blade, and a good rip fence that is part of the saw. If you've got a small saw, 5.25" or even smaller, that is much better than the standard 7.5" construction saw which will be difficult to manage. The technique involves retracting the blade guard manually, place the front edge of the saw deck on the work piece and slowly pivot the saw down into the cut, while using the rip guide to make sure you make the cut at the proper place. Then run it to the other end. I've done with with cuts as shallow as 1/8" with good results. Others will cringe at this suggestion, but done with care, it is a lifesaver.
Clean up the cut with hand tools -- chisel, sandpaper.
I've got another thought for a free hand router cut. Don't drill the corners. Use a rabbet bit (with a bearing at the bottom end) if you can find one that will cut the correct amount of wood. You might think about mounting some scrap wood inside to be the guide for the rabbet bit. This lets you do all the cutting with one bit. If you can't/don't install a guide inside, you can cut the rabbet, leaving the guide strip at the bottom. Then use a flush cut bit with the bearing at the top to remove the rest of the material. The flush cut bit with the bearing at the top is the same kind of bit often used with a dovetail jig. http://www.routerbits.com/cgi-routerbit ... 0_10468+47 Like at this link, it's called a template bit.
As for the baffle, most of it's been covered here already. T-nuts, hurricane nuts, or threaded inserts are the ususal hardware. Spray paint the whole baffle flat black after you cut the hole and insert the hardware. Black matches the cone. It is really the only way to disguise the baffle and the hardware.
Good luck.
-
guitardude57
- Posts: 355
- Joined: Fri May 15, 2009 6:19 pm
- Location: Austin, TX
- Contact:
Re: Anyone any good with woodwork?
It would almost seem the solution would be to sell the cabinet as is. Maybe someone out there could find a use for it.....before it gets buggered up further. After all it is a nice looking box. Maybe a shorter height chassis would be OK in there. A cleat or 2......done.
A bad cut with a saw trying to re-adjust, it is firewood.
Most folks do not have the correct tools for the job (woodwork-cabinet making) so we improvise with what we have. I know this.
A good lesson learned here.
I would just make a new cabinet to correctly fit things. The next cabinet will be easier to make.....just because.......... you know what you know, now.
Something to be said about measuring twice and cutting once.........
Mike
I am never surprised and always amazed
I am never surprised and always amazed
Re: Anyone any good with woodwork?
What's wrong with just taking a router and carefully routing out the needed space Affix a straight edge if you are not steady enough to do it free hand. Don't make it harder than it is!
-
jammybstard
- Posts: 40
- Joined: Fri Mar 05, 2010 7:50 pm
Re: Anyone any good with woodwork?
Thanks for all you replys; I really dont want to be modding the cutout, neither me or my equipment is that good (this has all be done in the front room of my flat!).
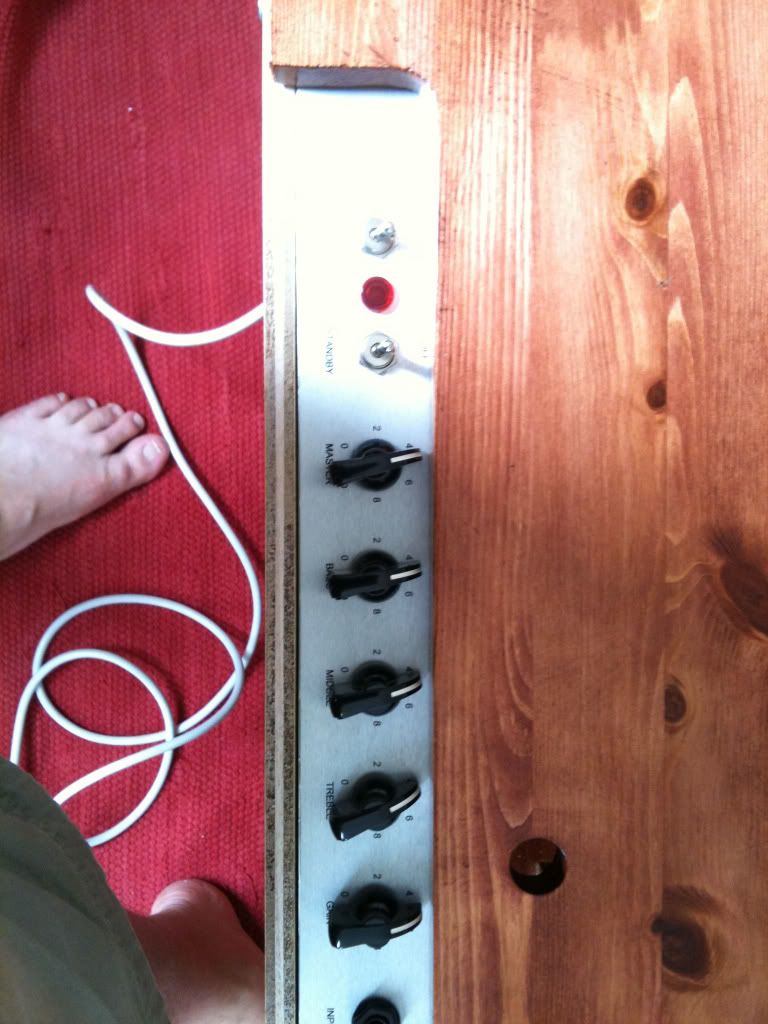
I've been putting it all togeather again today and I think I've been worrying without reason really; I mounted the back panel with some spacers to see how thin a back panel i could get away with, at the moment it's 12mm, If I adjust it to 8mm the controls sit just fine and all the text is visible; I recon an 8mm back panel will be strong enough, I'll go see what off cuts they have at the local timber shop.
[IMG:768:1024]http://i51.photobucket.com/albums/f368/ ... b94fc4.jpg[/img]
Sorry, Cr4p photo!
It was really nice to get the 1972 GreenBack mounted; It's been sitting under my bed for 2 years doing nothing and it sounds so much better in this than it did in the cardboard box,
I wish I could get the Orange Amps sticker off and back to the Celestian lable but there's 40 year old horse hoof glue holding that down and it's not coming off without a fight!
I'm sorry I ended up not been able to follow alot of good advice about mounting the speaker with T-bolts but in he end the Routers gone a bit wide of the mark and the mounting holes have ended up too close to the edge of the circle to put a t bolt in or even use a self tapper really, I think it would split the wood; so I went with Plan A and epoxyed some lengths of stud bar into the holes. It holds the speaker nice but it is dangerous as someone pointed out above, one slip putting the speaker on and it would be punctured cone!
[IMG 768]http://i51.photobucket.com/albums/f368/ ... 4690f1.jpg[/img]
[IMG768]http://i51.photobucket.com/albums/f368/ ... 6ec8ad.jpg[/img]
It's coming together nice though and I played it for the first time today; It sounds really good, I'll have to post some clips when it's all done.
[IMG768]http://i51.photobucket.com/albums/f368/ ... f6cb06.jpg[/img]
I call it the Sunbeam after I found the badge on ebay. It's the same as the badge on my Dads car when I was litttle (Sunbeam Rapier); It has a nice 70's feel!
I've been putting it all togeather again today and I think I've been worrying without reason really; I mounted the back panel with some spacers to see how thin a back panel i could get away with, at the moment it's 12mm, If I adjust it to 8mm the controls sit just fine and all the text is visible; I recon an 8mm back panel will be strong enough, I'll go see what off cuts they have at the local timber shop.
[IMG:768:1024]http://i51.photobucket.com/albums/f368/ ... b94fc4.jpg[/img]
Sorry, Cr4p photo!
It was really nice to get the 1972 GreenBack mounted; It's been sitting under my bed for 2 years doing nothing and it sounds so much better in this than it did in the cardboard box,
I wish I could get the Orange Amps sticker off and back to the Celestian lable but there's 40 year old horse hoof glue holding that down and it's not coming off without a fight!
I'm sorry I ended up not been able to follow alot of good advice about mounting the speaker with T-bolts but in he end the Routers gone a bit wide of the mark and the mounting holes have ended up too close to the edge of the circle to put a t bolt in or even use a self tapper really, I think it would split the wood; so I went with Plan A and epoxyed some lengths of stud bar into the holes. It holds the speaker nice but it is dangerous as someone pointed out above, one slip putting the speaker on and it would be punctured cone!
[IMG
 768]http://i51.photobucket.com/albums/f368/ ... 4690f1.jpg[/img]
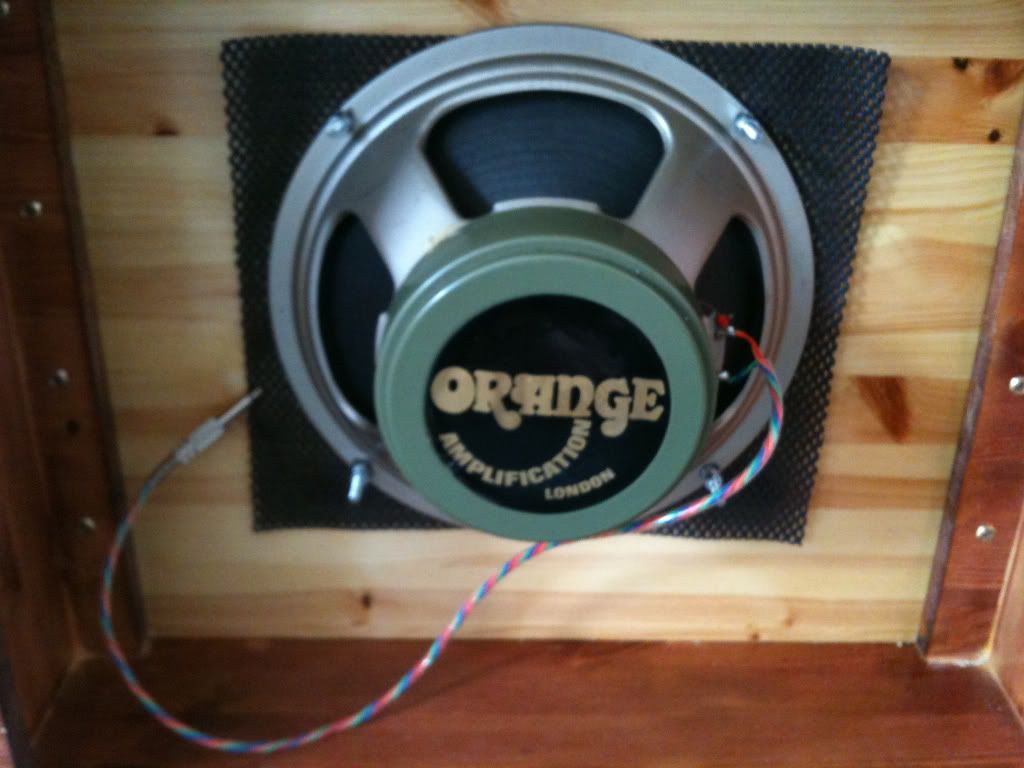
[IMG
768]http://i51.photobucket.com/albums/f368/ ... 6ec8ad.jpg[/img]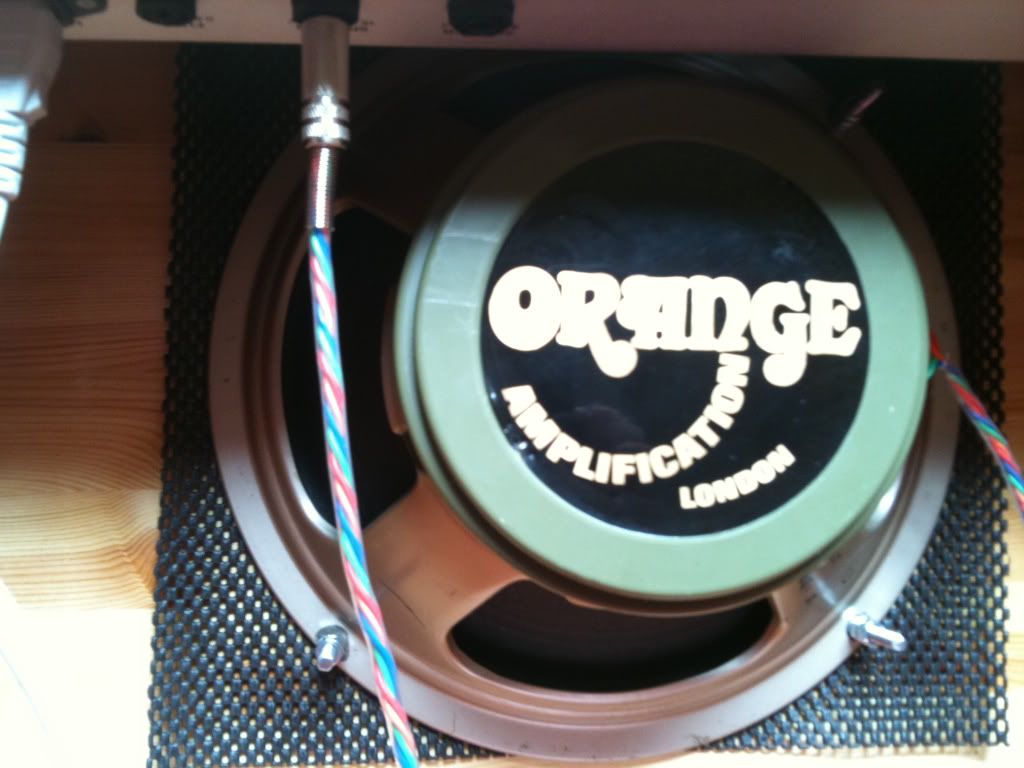
It's coming together nice though and I played it for the first time today; It sounds really good, I'll have to post some clips when it's all done.
[IMG
768]http://i51.photobucket.com/albums/f368/ ... f6cb06.jpg[/img]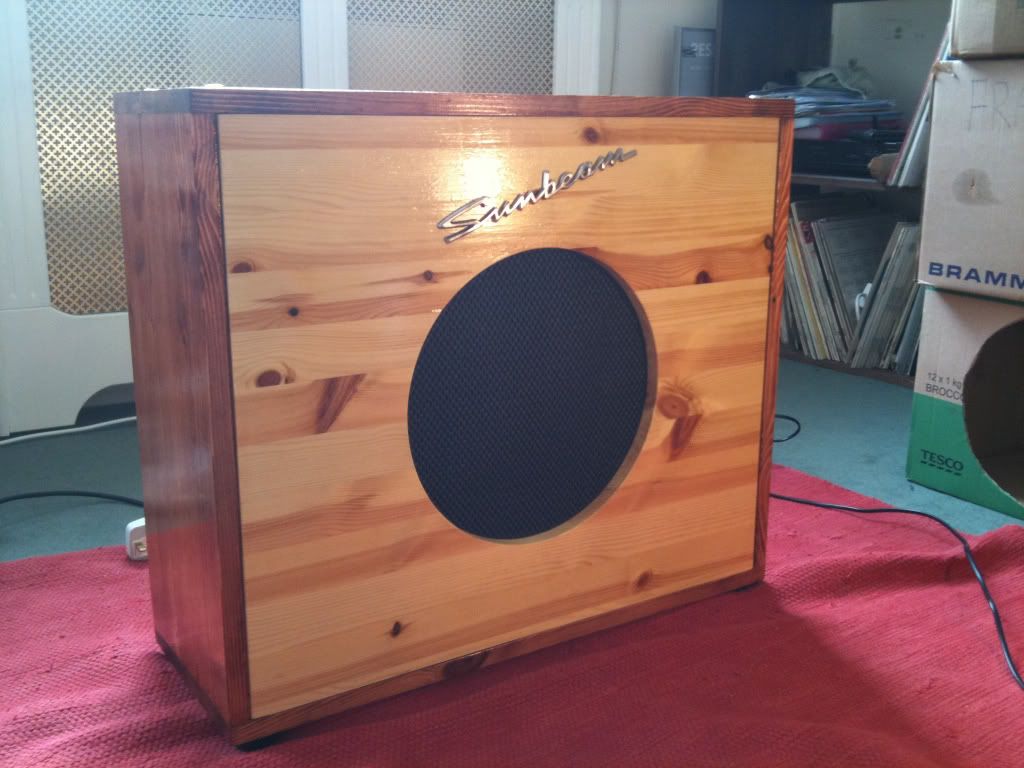
I call it the Sunbeam after I found the badge on ebay. It's the same as the badge on my Dads car when I was litttle (Sunbeam Rapier); It has a nice 70's feel!
Re: Anyone any good with woodwork?
Well you could cut the cutout a little lower, but of course you would have to match the stain and finish.
This is how we get wisdom, by making mistakes to learn from.
You will never make that same mistake again.
This is how we get wisdom, by making mistakes to learn from.
You will never make that same mistake again.
Tom
Don't let that smoke out!
Don't let that smoke out!